

I remember having almost every She-Ra Toy you could think of as a kid. I also had the underoos and watched he show religiously. She-Ra was a HUGE part of my childhood and it really was only natural that I should make a She-Ra costume. So, here goes!
Now, I hadn't particularly thought about putting together a build log for this when I started it, so I mostly took pictures to show progress & share individual pieces. Feel free to comment or message me for more info if you’re interested in learning more!
First up, this was the art that inspired the look I wanted… I was inspired to make a Norse Princess feel to it, especially after watching Thor 2. I wanted to add lots of details and Celtic knot work type designs to give it depth because the original She-Ra design from the cartoons isn't too detailed itself.


Sewing is not particularly my strong suit, so I figured I'd get that part out of the way first. I used the same pattern as for my Poison Ivy costume Simplicity 2069), and just winged it on a skirt. I wanted a nice crisp look for the fabric, but something that would be cool to wear for hours, so I decided on Linen.

Yeah, that's got a looooong way to go, but not bad overall! The next thing I wanted to work on was the chest piece. I chose to work with craft foam for a lot of the costume, and I'd never worked with craft foam before! It wasn't too hard, once I got the hang of it.


The first thing I did was to check out some techniques for the foam since I really wanted to give the chest armor a feather motif. I settled on "engraving" it! First I took a ball point pen and pressed real hard and made grooves that sorta looked like feathers. I've always pressed hard when I write, so this was easy! Next came painting and weathering. I used acrylic paints to for the gold base coat and weathering. Shiny!


Bracers were next on the list. Once I had engraved my basic design onto them, I coated them with some wood glue and started to trace the raised designs onto the bracers with puffy fabric paint. I was lazy, and just used what I had on hand: green! This took lots and lots of puffy paint. And a long time to dry. The right is after the bracers after had been weathered. Pretty much done, except for the blue jewels I wanted them to have.

While the bracers dried (which took forever), I started to work on the helm. Oh yeah, check out my awesome wig I got for She-Ra! Thank you, Arda! I'm a pretty awesome looking blonde thanks to the Candy Striper wig! Anyways, I prefer to do my mock-ups on paper first and work from there. This is my paper crown. Burger King's got nothing on me!


Once I had the paper patterns set up, I traced them onto some left over Sintra I had and heat formed them into how I wanted them to look. I was so excited to have something I could wear now for the helm, that I couldn't help myself and had to put it on. See that? I'm barely containing my fangirl excitement at almost being She-Ra!


The helm looked cool, but pretty flat and blah. So I got out some Magic Sculpt, and a big NorCal Margarita and added a TON on detailing for the wings and some simple designs on the rest of the helm.

After about 5 coats of wood glue, I spray painted it all gold. Lovin' it!!


I love weathering things. It just makes everything armored more awesome looking. I even weathered the backside of the wings in case anyone got up close and was looking! One of the neat things I did to the gold armor pieces was to coat them in a clear acrylic with gold glitter after weathering for some added glam and sparkle. It's hard to see in the pictures, but it looks amazing in person!

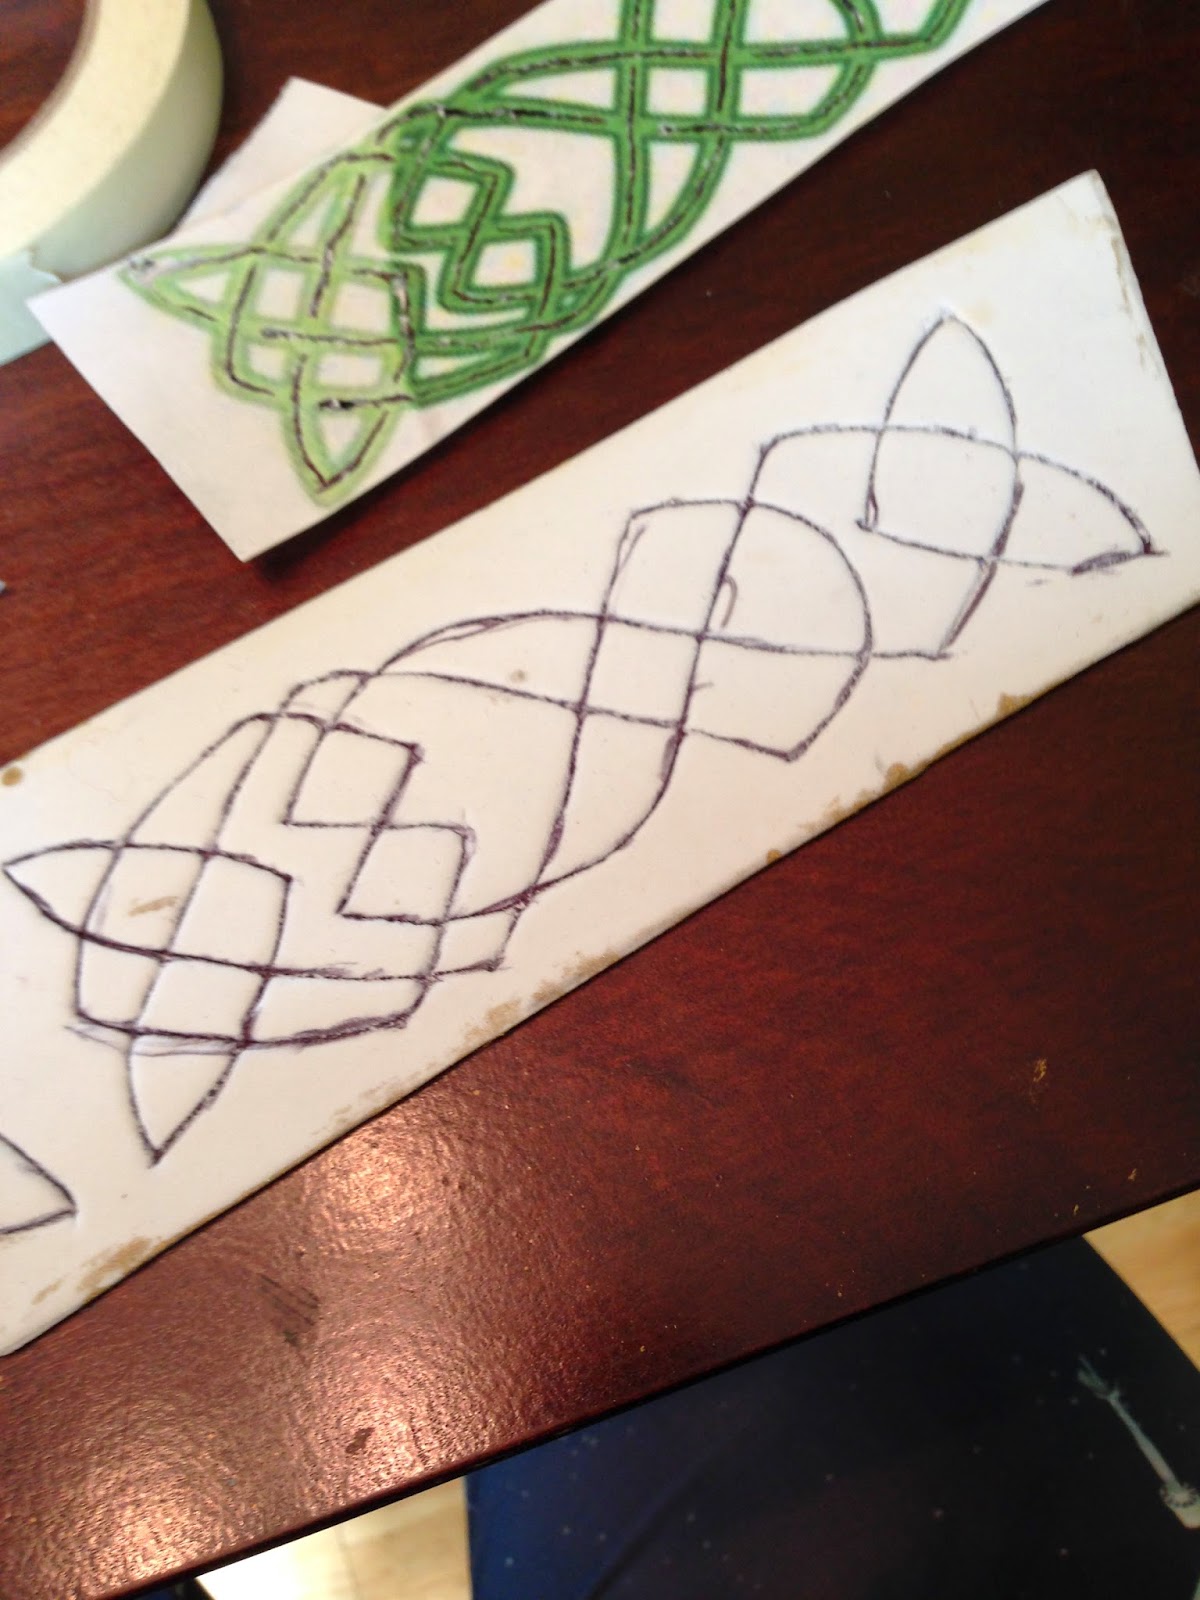
Next up: the belt. I didn't feel comfortable freehanding the knot work designs I wanted for the belt, I I traced it with my trusty ballpoint pen onto the craft foam belt.

After the bracers, I had no more puffy paint for the belt, So I went out and got some yellow puffy paint so I wouldn't need quite as many coats of the acrylic! I didn't coat the belt in wood glue this time, opting for a look that would be more like leather. So I just painted the acrylic right over what you see in the pic above.


So, I was originally planning on using these boot covers over some shoes I'd been using with my costumes for a while now. However, I went to Big Wow Comicfest right after this picture was taken and decided I just couldn't wear heels like that at a convention anymore. Actually, I swore off heels all together. They hurt my feet, and I know beauty is pain but I cant have fun if I feel like my feet are being battered like in Misery.

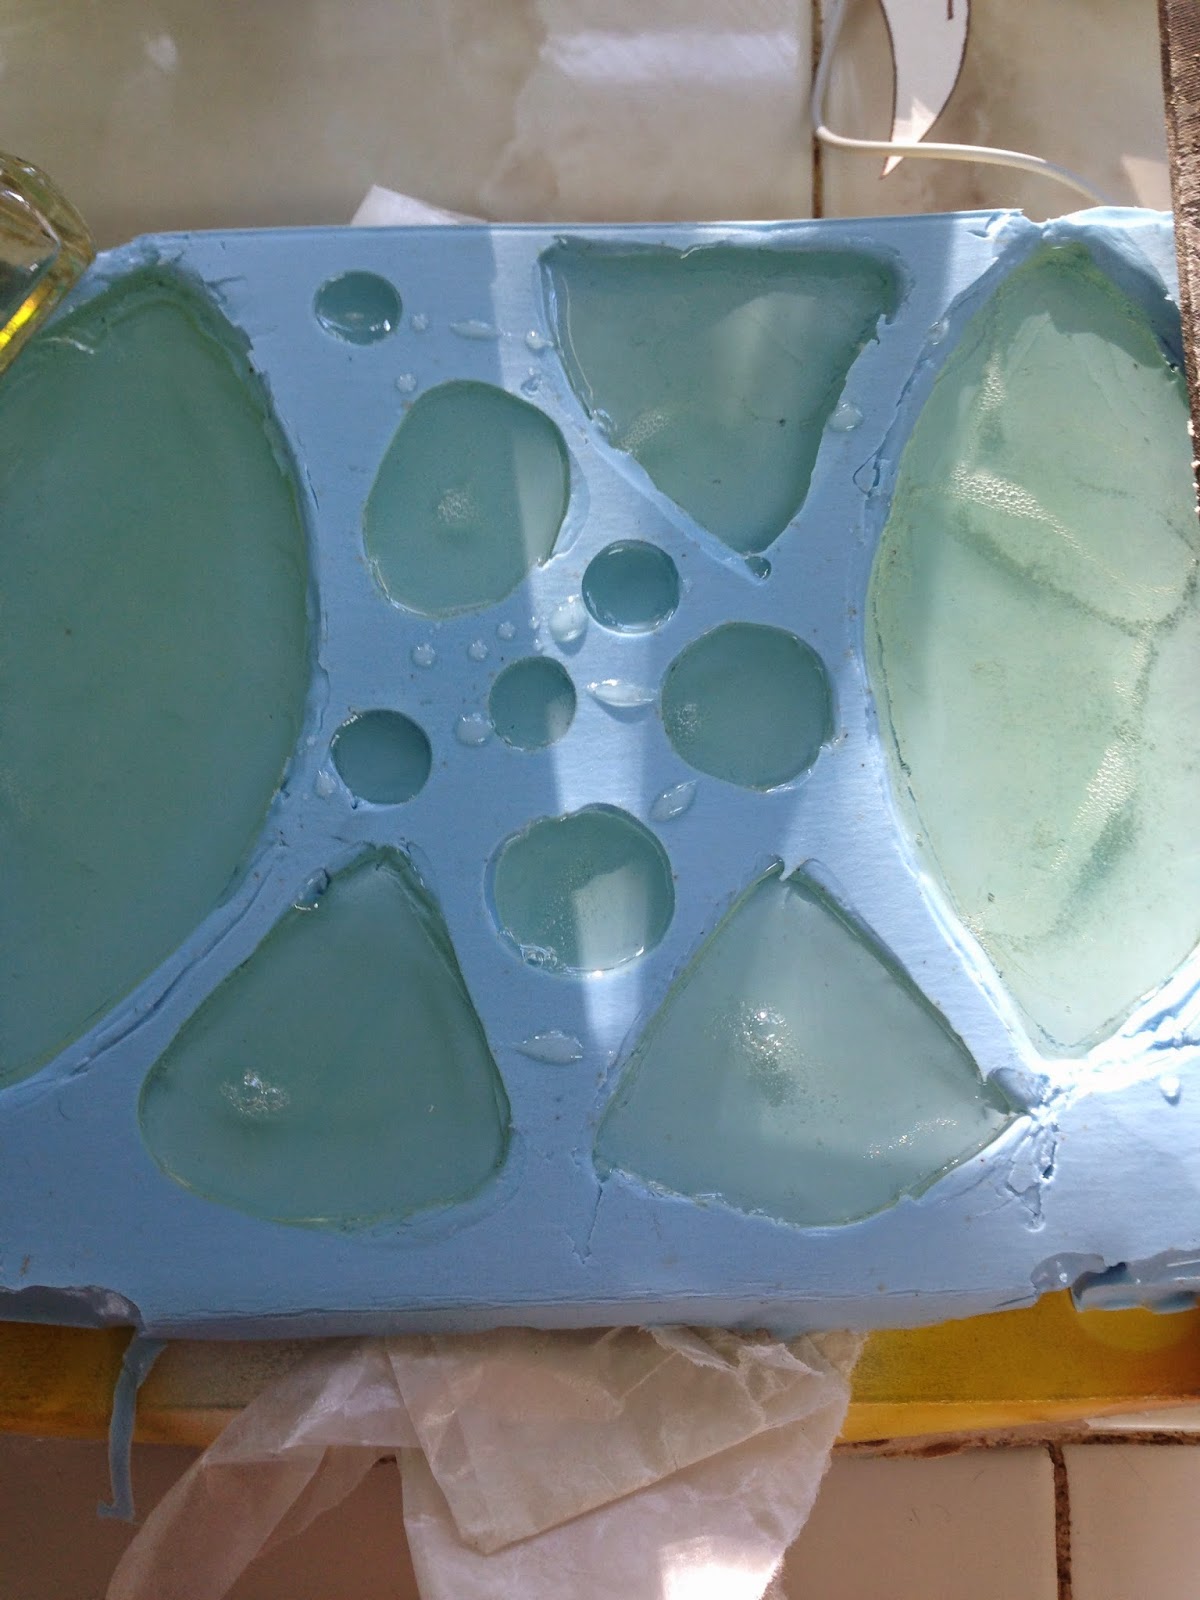
So, had no idea what to do about She-Ra's boots now, and I decided to work on something else entirely. One of the things I like doing is making everything myself. So, rather than trying t find some gems that were large enough for the sword, chest, belt, helm and bracers I decided to make them myself from resin! First I made Magic Sculpt casts of the gems, then I made a silicone mold. Now for the resin casts! The first set failed horribly, and I learned that actually reading the directions would've helped immensely...

The second cast worked much better! Yay for reading! I did the colors on these using nail polish. The blue ones look like a pool, I love it!


Next was the sword. Ohhhhh boy, this was so exciting! First the paper mock up. I actually don't like the traditional design of her sword, with those cutouts. So I changed it up a bit, but still kept to to the original style. I traced it onto some 1/2" Sintra and started cutting it out. Sintra is usually pretty easy to work with, but 1/2" is a huge pain! It took days to cut it out, and sand so that the edges were beveled on both sides.


Magic Sculpt time again! As you can see, I left the grip and area where the gem will go without details. I coated this sword with probably about 7 coats of wood glue before sanding it down. Then I spray painted silver. So shiny!


And weathering again! I spent a lot of time weathering the blade to get the look I wanted on it. There's some glitter nail polish that I used to highlight some of the areas on the sword itself as well. The grip is some spare pleather and gold embroidery thread.

Go on, drool over it. the Sword of Power is positively awesome! Sometimes, when no ones around, I play sword fight with it because I'm cool like that.

I started gluing my gems onto everything and was feeling pretty awesome about the sword being completed, I got the necklace (made from Sintra and fabric paint) and the cape done. When I took this picture I realized I had forgotten entirely about She-Ra's "boob wings"!

It was pretty easy to get those made up, now that I've become somewhat of a pro with craft foam! I wanted them to have a similar engraved look as the chest armor, which turned out awesomely!

Now it was time to tackle the shoe dilemma. Thankfully, we watched 300 and got inspired by the Spartan's sandals! A quick trip to Walmart where I picked up the base shoes, and ribbons. I hot glued it all together for a really awesome result!

At this point, the whole outfit was pretty much done. But I had realized that the day I was planning on wearing everything for She-Ra's debut that it was supposed to be over 100 degrees! So I decided to change up the wig so it wouldn't be so hot. A whole afternoon of watching Community later, I had braided sections all over the wig. I weaved in some gold embroidery thread, and made little stretchy beaded hair ties to match the colors of the gems. I wish I had taken more pictures of this, because it looked really awesome!


So, I wore She-Ra to the Santa Rosa Toycon and had an amazing time with it! I got my picture in the local paper's online gallery of the con and I even won Best Portrayal!!!
Here's a few more vanity pics of She-Ra for you to enjoy....


